At last I have gotten around to writing about the cosplay I created last year. I have just been 1) SUPER busy, and 2) still dealing with travel blogs until this point because those are more memory dependent than this. So hi, I actually had the fortitude to create a cosplay last fall! I wore it to the annual RCCO Halloween concert, of course, and to work for an entire week so as many of my students/choir people as possible could see it.
I knew that I wanted to do a cosplay of Vivienne Urselmert, my Dark Knight from Final Fantasy XIV in order to complete my trifecta of Hot FFXIV Ladies (the sweet one, the noble one, and the dark one), and having previously attempted to begin with creating the greatsword and failing, I decided to not start with that. (So there will be a Part 2, hopefully next/this year, when I build a Cronus to go with this outfit!)
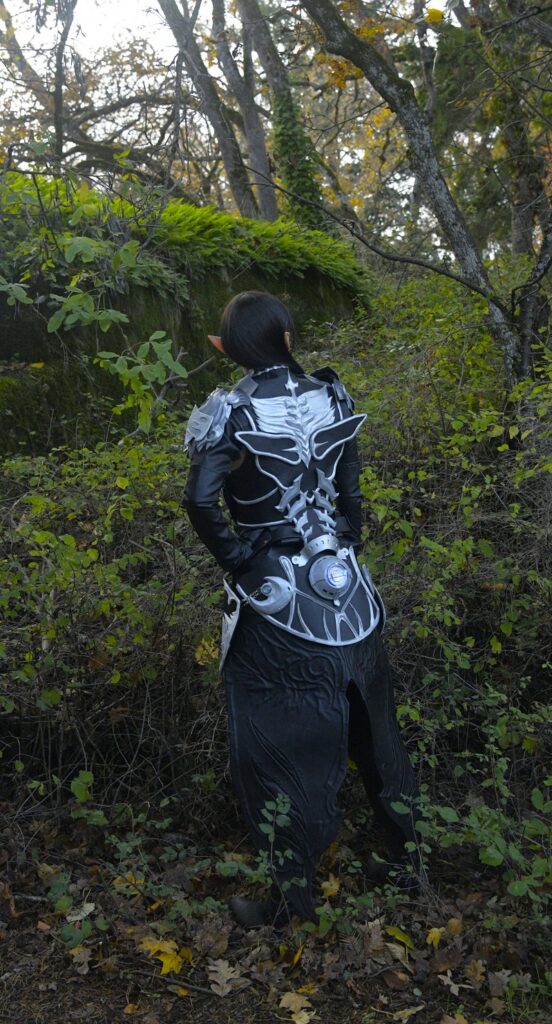
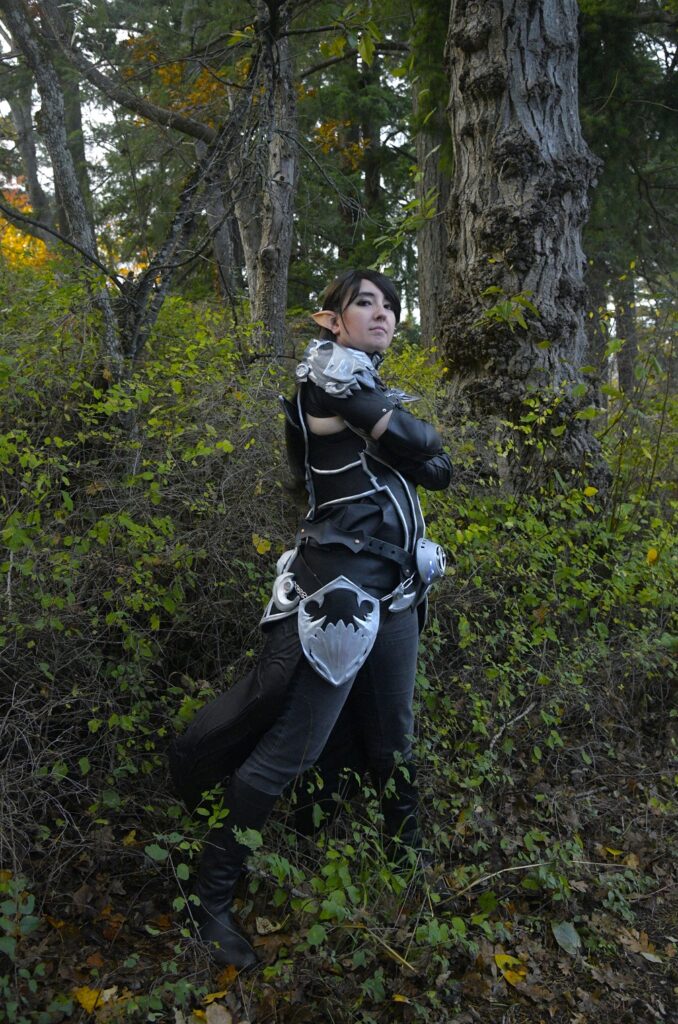
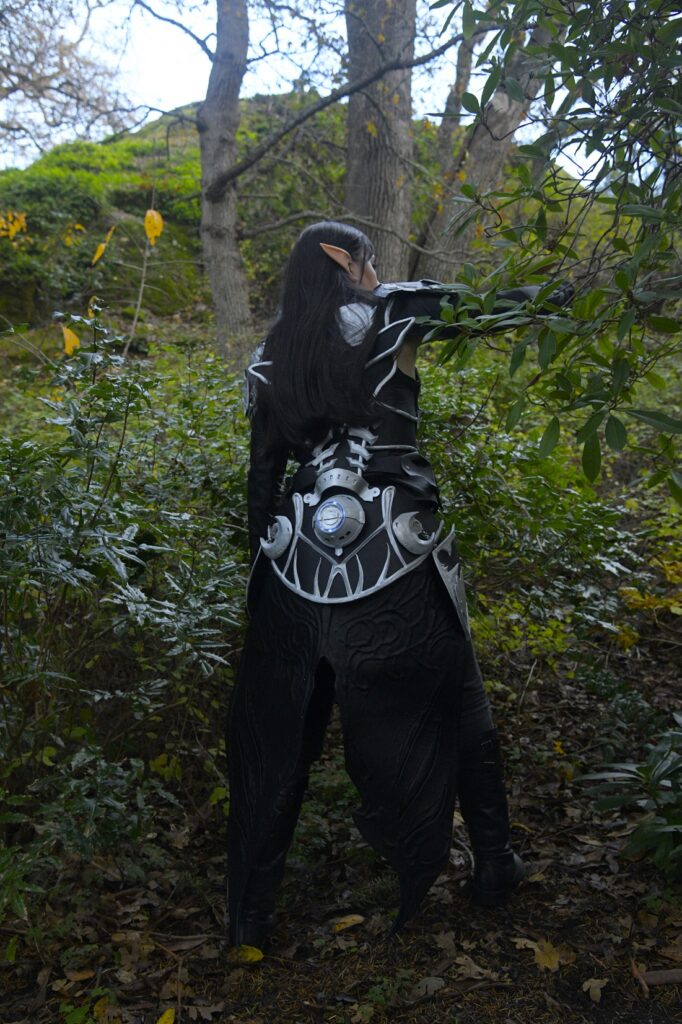
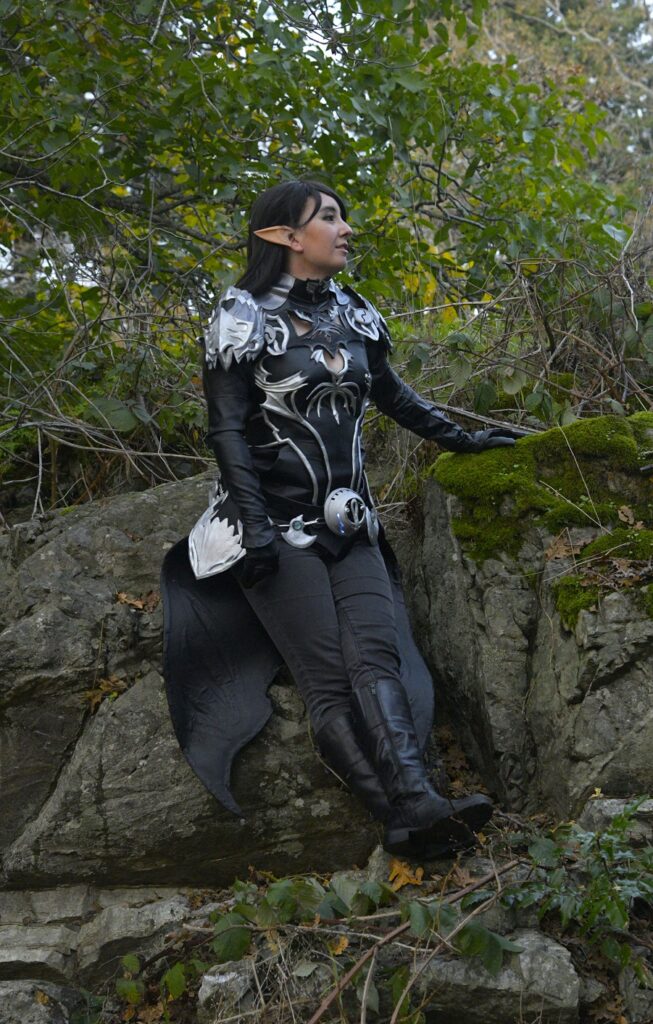
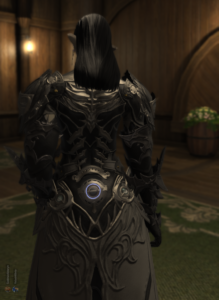
One of the first pictures we took, while my hair was all bundled out of the way, so you can see the back detail.
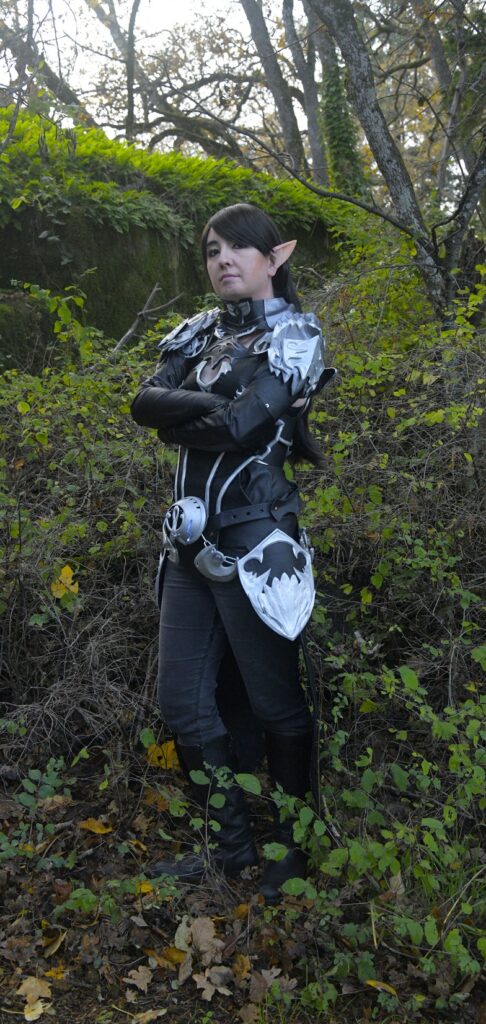
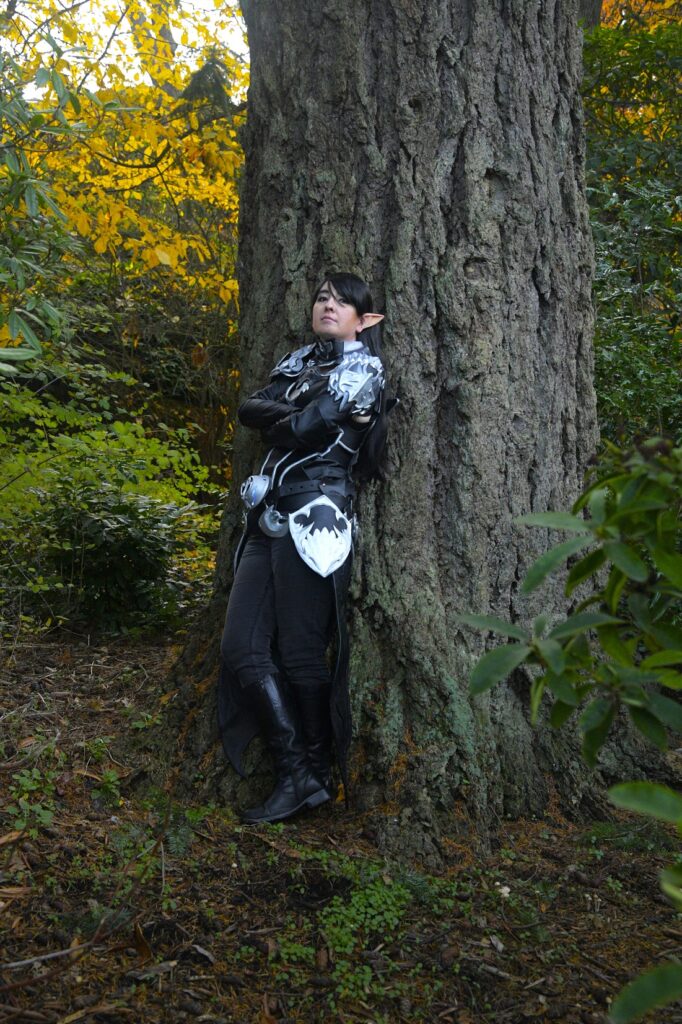
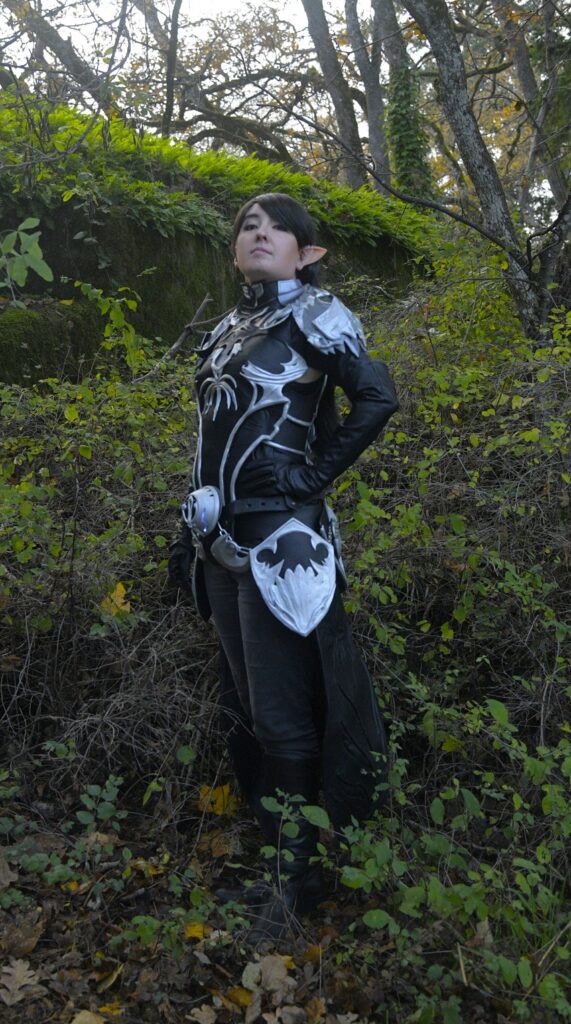
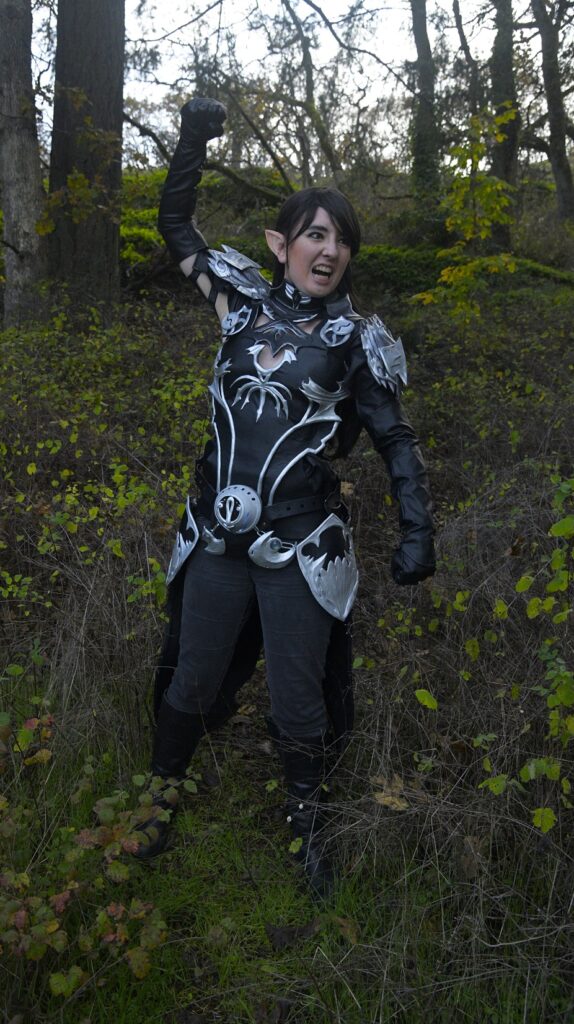
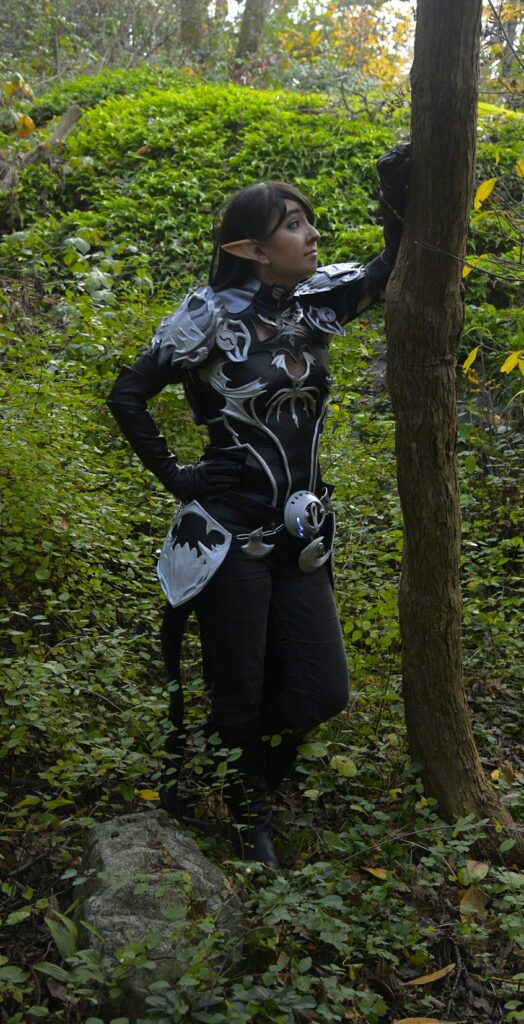
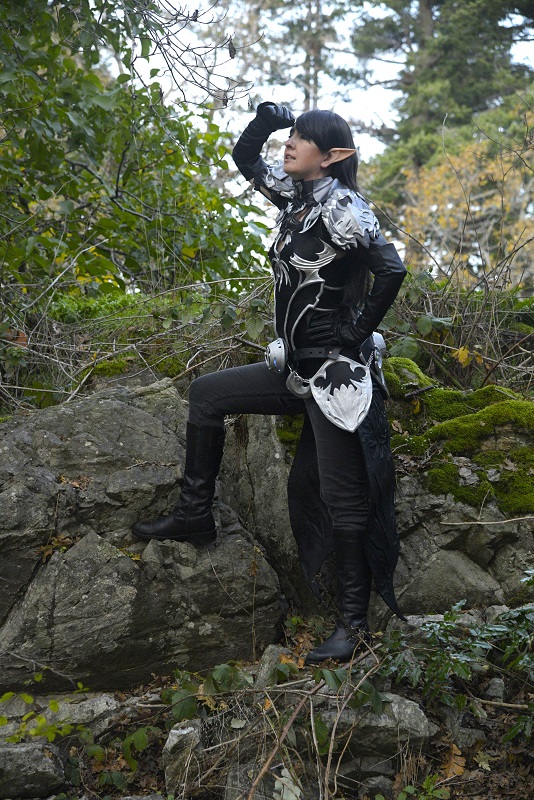
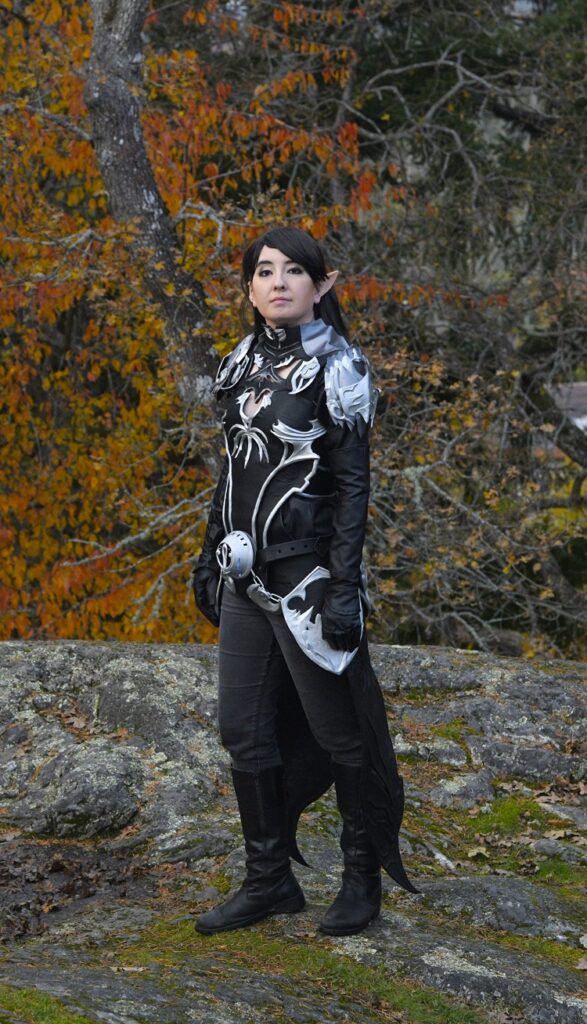
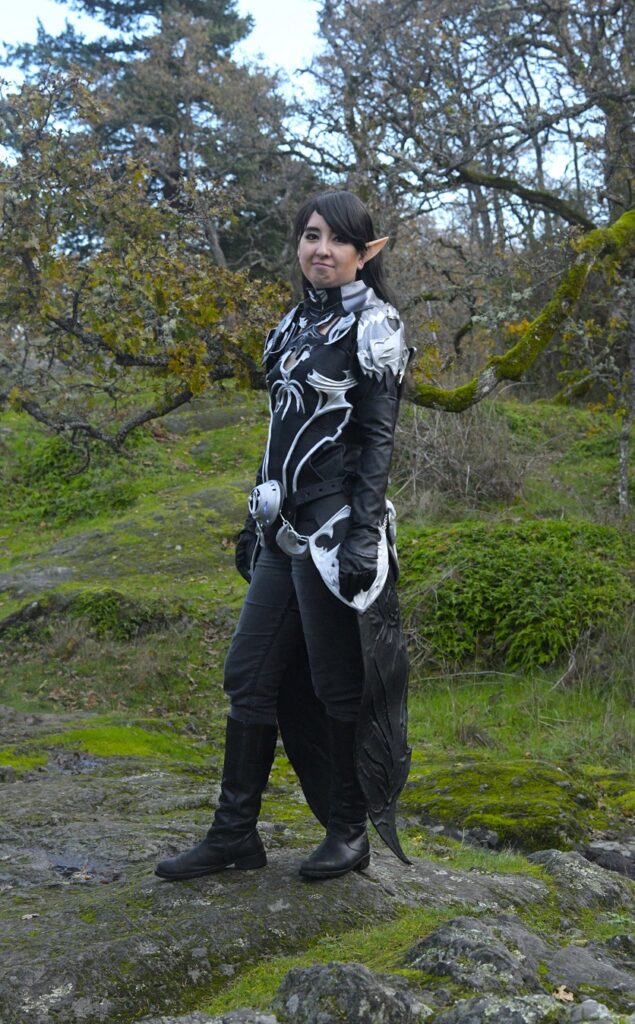
This is a random little park near my parents’ place, quite nice terrain for being in the middle of an old urban environment. I wanted something that was both foresty and rocky, like certain areas of the Southern Black Shroud forest in the game.
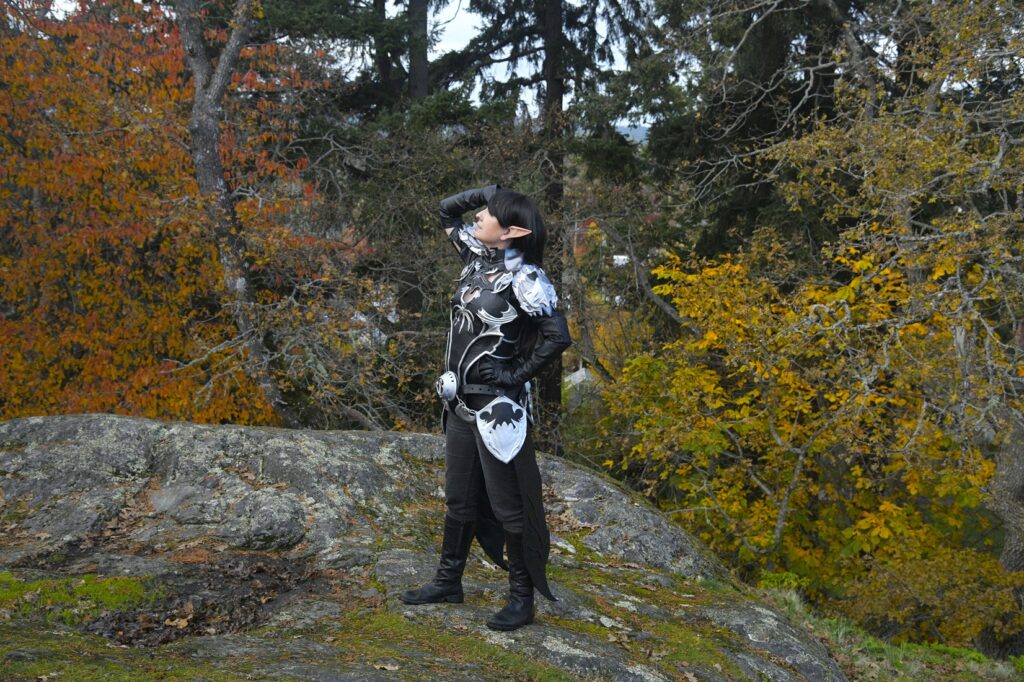
This actually isn’t /lookout, this is me trying to do an anime thing with my hair and it not happening because we don’t live in an anime world. Also before I remember to not lock my knees for posing.
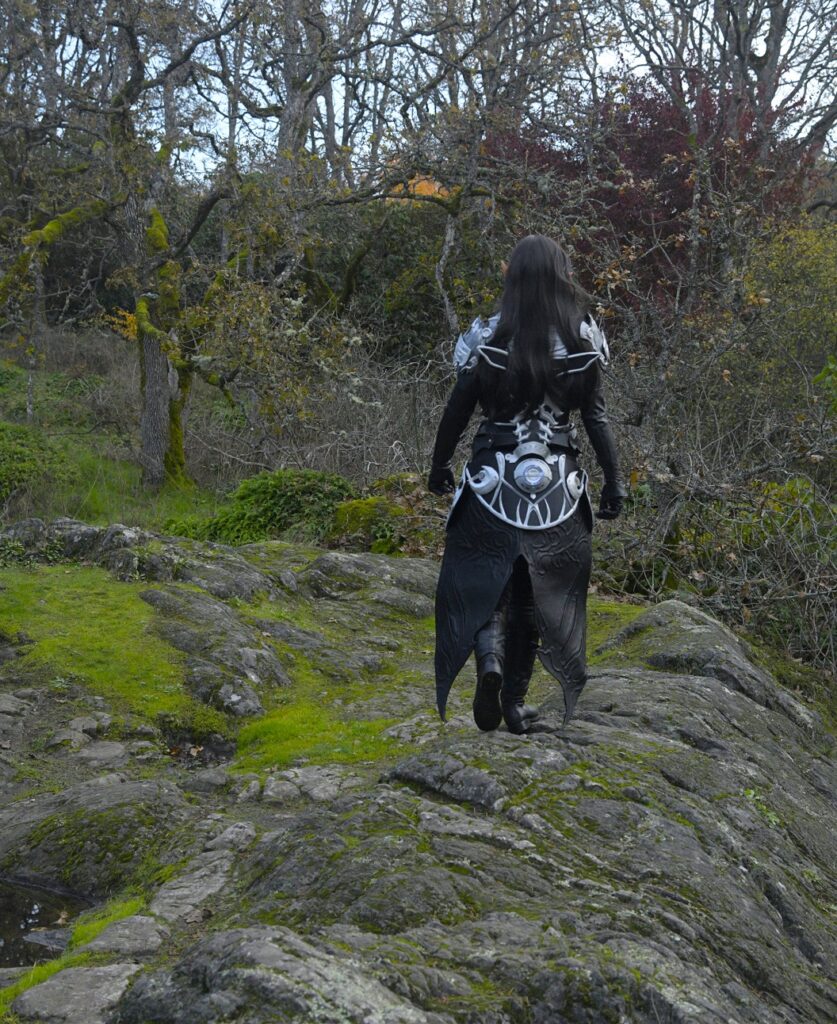
Tried to walk away dramatically, pay no attention to the fact that I’m about to twist my ankle (I did not twist my ankle) (but it’s hard to stride slowly on an uneven surface like this)
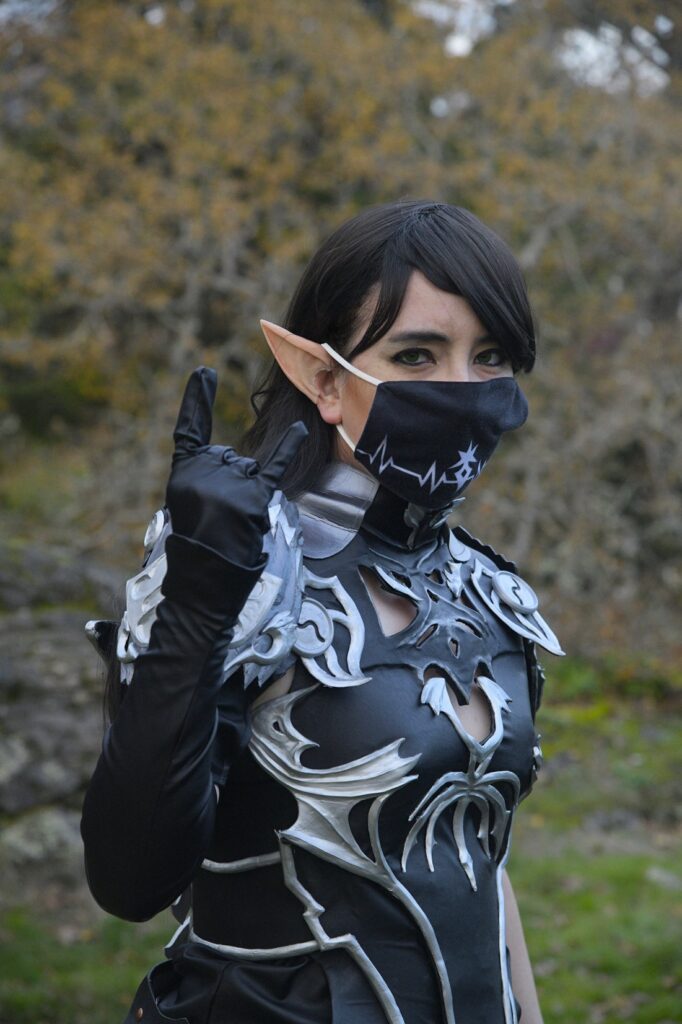
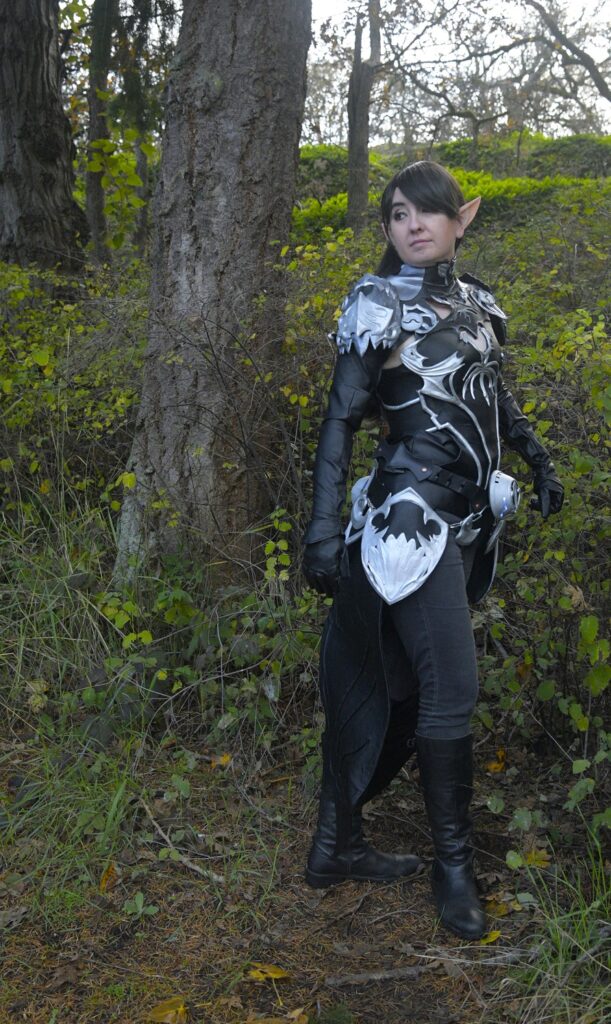
Not my best side, but hey here’s my Dark Knight mask, which I bought a couple years ago actually. Also the one image in which I bothered to photoshop my eyes: Vivienne’s eyes are green, but my contact lenses weren’t cooperating, and I figured for most of the others it would be far enough away that my eyes being dark would look natural. Maybe next year I’ll have a better pair of contacts!
My dad was worried that there would be some film grain on these photos, but when the original photo is like ten times larger than these resized-for-blogging pictures, you can’t really see any film grain? He tried running a photo or two through an AI sharpening tool, but I didn’t think the results were an improvement, it makes questionable decisions about edges and made my skin look plastic. I don’t mind a bit of grain if it feels real.
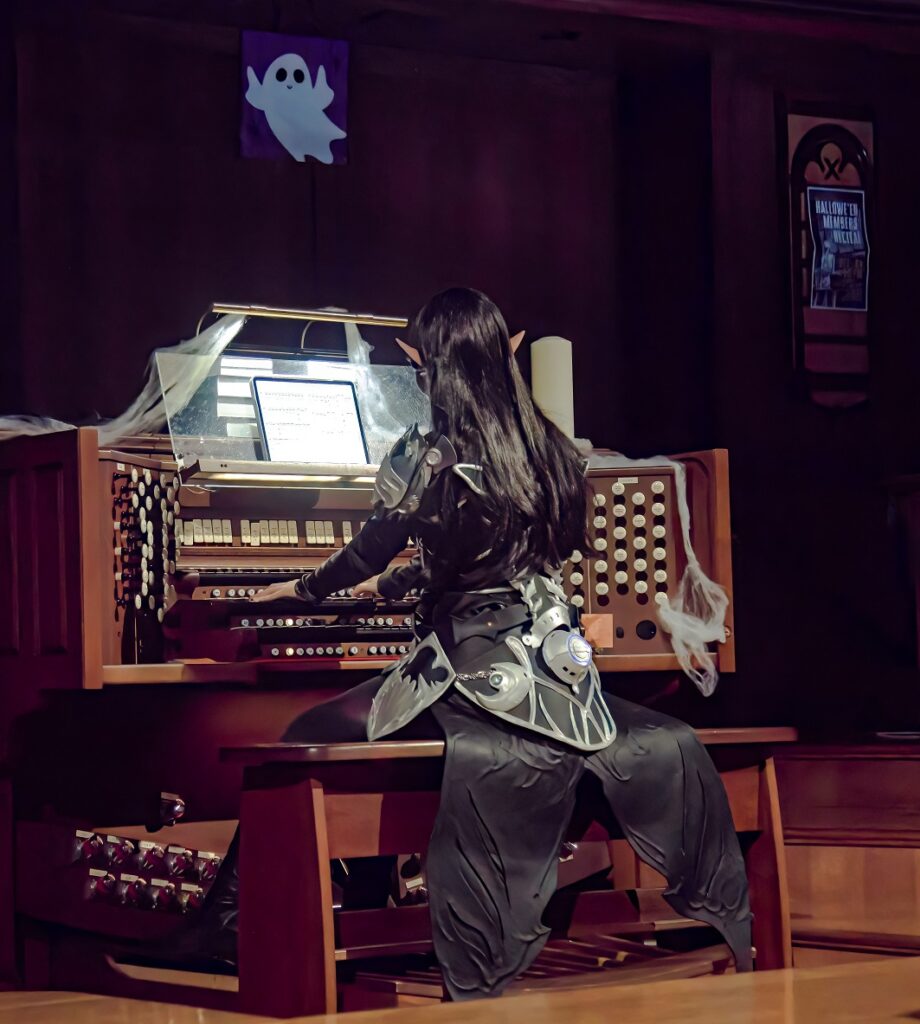
At the RCCO Halloween concert. I kept my boots on for the pedals! It made it harder, but then I didn’t have to take time fussing with them and it looks cooler. It’s not like the pedal part is terribly difficult for the most part anyway.
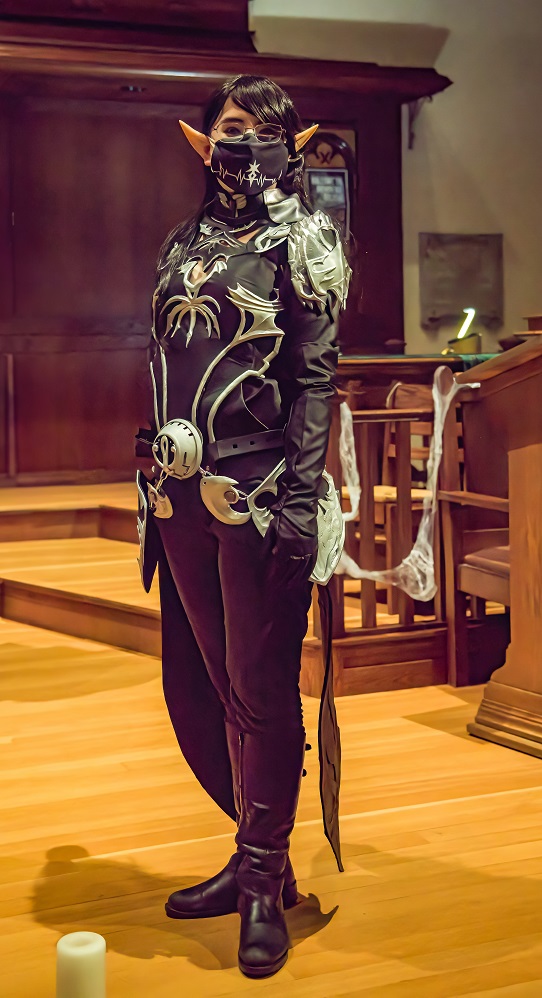
At the end of the concert. Fun fact: my own mother wasn’t sure if that was my real hair or not. (Wearing glasses because contact lenses not working, and I need to see to play music)
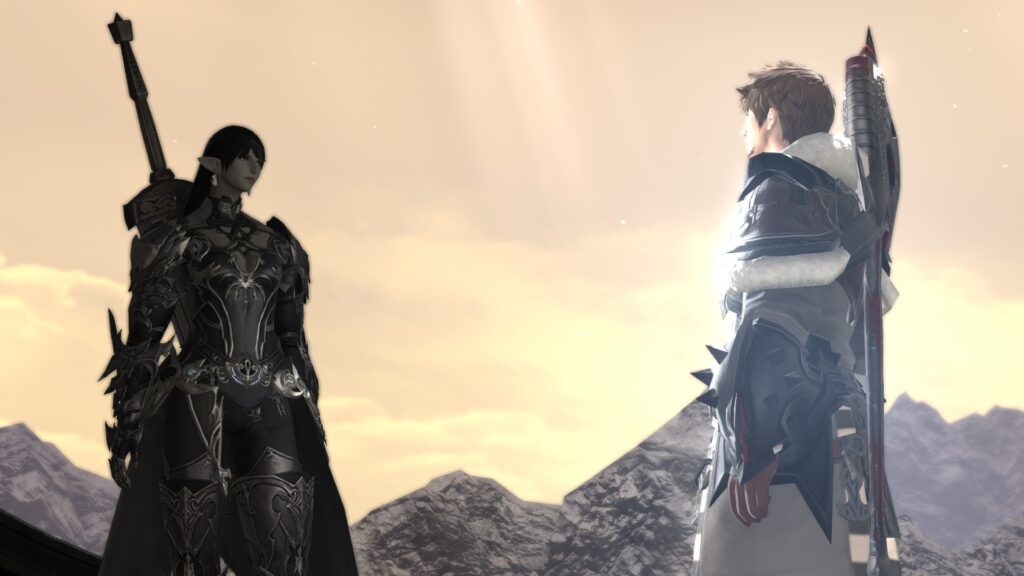
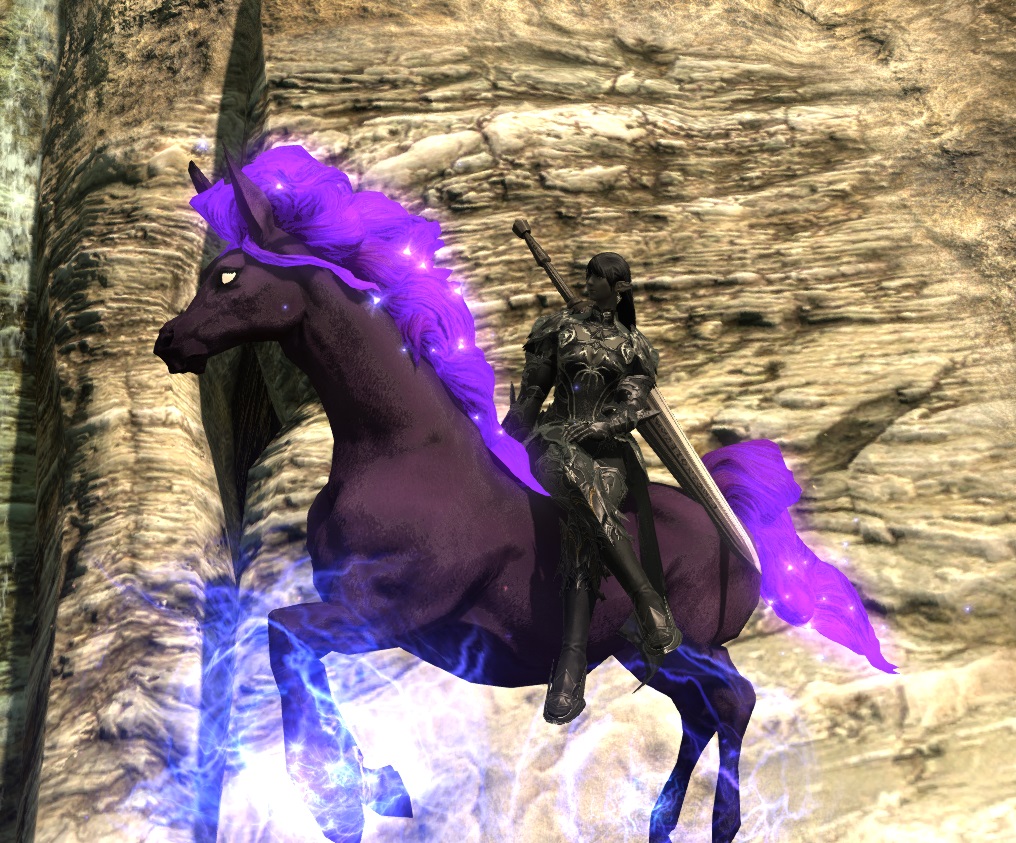
Vivienne Urselmert is one of the characters I play in FFXIV. She’s a Duskwight Elezen (dark elf), fighting to end racial prejudice in her homeland. Once upon a time, the Duskwights lived underground in the forest of the Black Shroud, but then the Wildwood Elezen took over the land aboveground. They branded the Duskwights as bandits and brigands, and hunted them. Even in the game’s present day, Duskwights are disproportionately accused of being criminals. This led to Vivienne’s mandatory Tragic Backstory, in which her village was attacked by an overzealous group of Twin Adder soldiers, and both her parents were killed. She was 12, but she picked up a sword as large as she was and fought back to defend her baby brother Alain. This left her with a lot of trauma that she hasn’t dealt with at all.
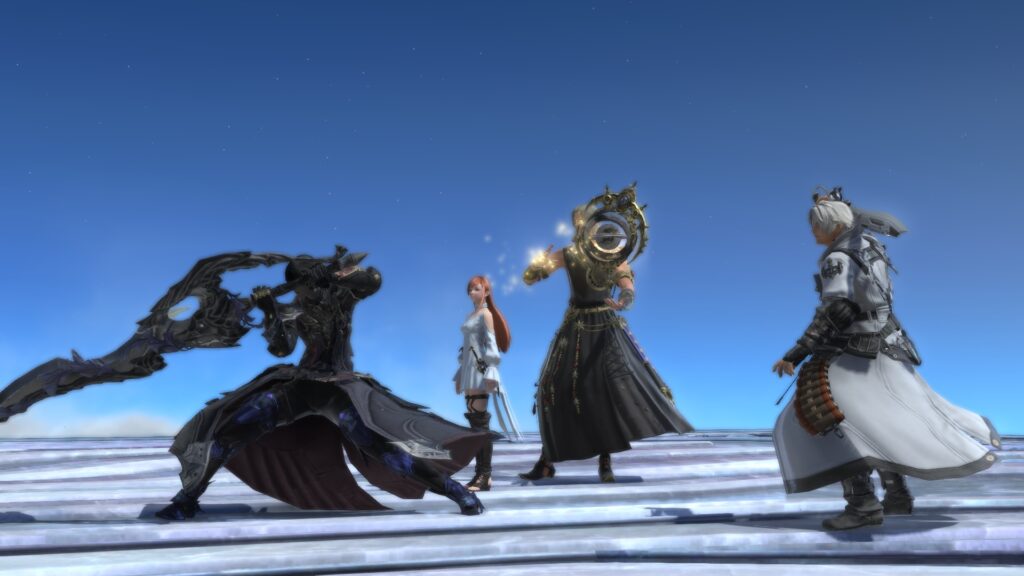
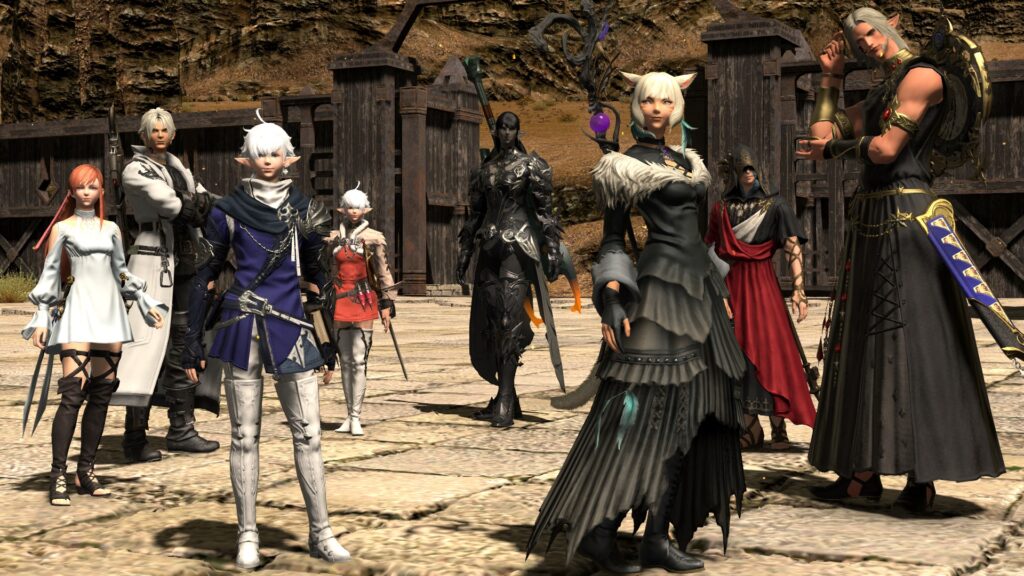
They were raised by a family friend who became like an uncle to them, but eventually Vivienne went her own way in the world, learning to use the umbral magic within her along with the lucky find of a Dark Knight Stone. She served as a mercenary for a while, honing her skills, and eventually met the grouchy old Scholar healer Aentfryn Zwynswaensyn. They adventured together for a while before meeting the rest of my Warriors of Light (including Achiyo and Rinala) on a quest to defeat the Primal earth god Titan. While they did not remain together immediately afterwards, they later joined forces again to drive the evil Garlean Empire out of Eorzea once and for all, and then Vivienne and Aentfryn realized that their paths were inextricably bound with the Scions of the Seventh Dawn and decided to stick around.
As matters currently stand in the fic, Vivienne has spent most of the game patches in-between the main story doing Hildibrand comedy quests – mostly against her will. But she’s always up for a fight when she gets back to the main story, because the more notoriety she acquires, the more respect she wins for the Duskwight people and the more peacefully Alain will be able to live. Her original jobstone that gives her the Dark Knight powers broke during The Parting Glass, a particularly dramatic quest, but she found a new one through the spirit of Fray Myste and the 3.0 Dark Knight questlines. And fear not, people who have played 5.0, she will be taking a starring role in the expansion literally designed for Dark Knights. (also spoilers, she and the former Imperial engineer Nero have a slap-slap-kiss thing going on.)
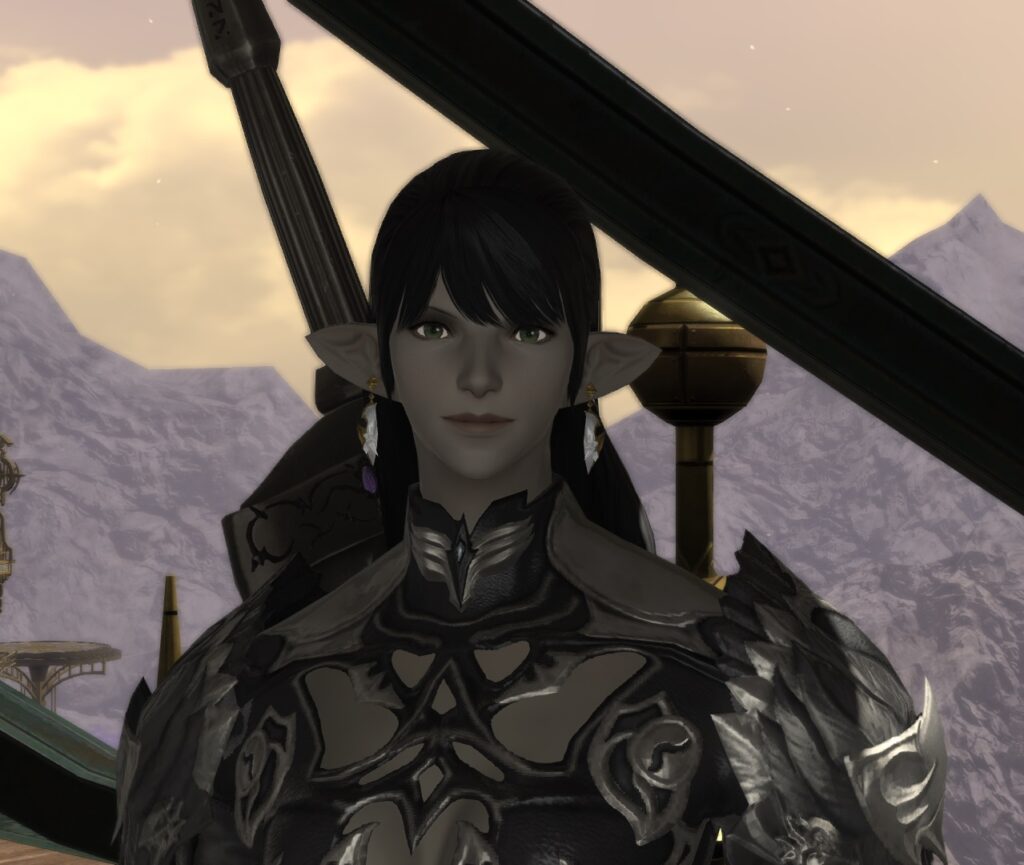
Vivienne’s outfit is the Omicron Gambeson of Fending, and then her boots, pants, gloves, and helm are all from the Dark Knight Abyss set. I think they work really well together! And I don’t like the rest of the Omicron set, especially on female bodies – it has thigh windows and these weird little booties. My headcanon is that she was wearing another set of armour, perhaps the Abyss chestplate, perhaps the High Allagan chestplate, but it was irreparably damaged during Omega Alphascape fights, so Nero tol Scaeva worked day and night to craft her the Omicron chestplate as a replacement, because he acts like an irredeemable jerk but he really does like her.
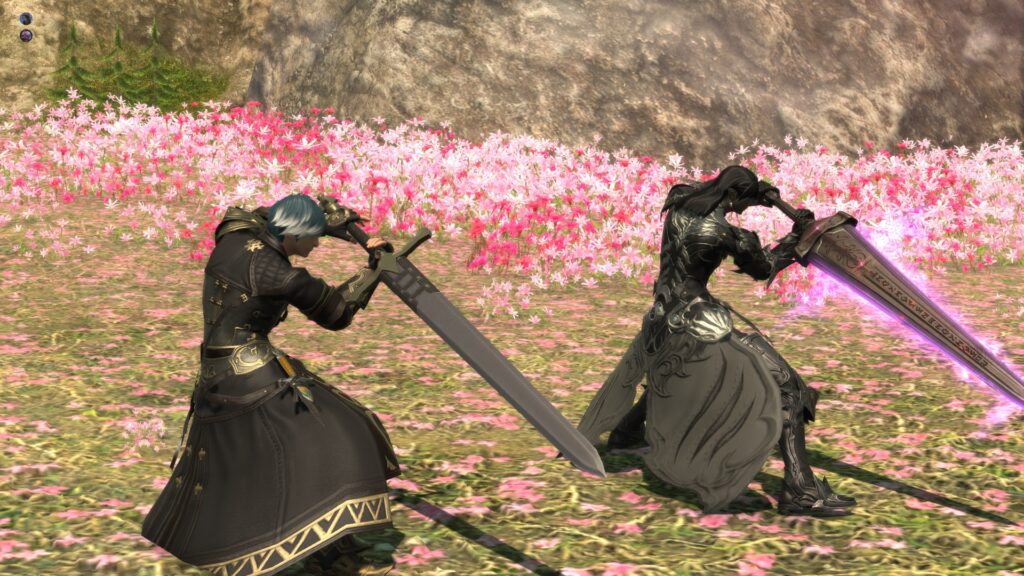
Her main sword since 3.x is Cronus, the Anima weapon, and I don’t remember what she was wielding before that because Cronus is so cool.
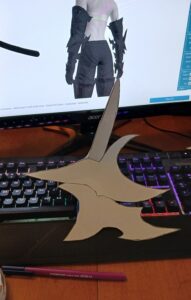
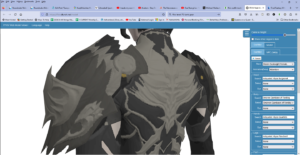
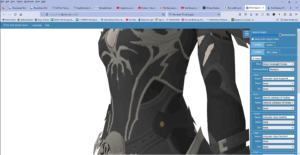
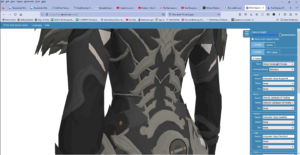
The start of any crafting project is reference pictures, and I have two sources to rely on: the game itself, and also an online browser app that allows you to display any species of character in any clothes. This was very useful for getting the broad shapes, since it doesn’t do anything with scene lighting to get in the way. So:
Maybe I should have put the model to a female human instead of a female elf, because I myself am not an elf, but I wanted to see the elf proportions and work to them. One of the biggest challenges of this outfit is figuring out which parts belong to which layer, especially around the waist, where there are several parts that appear to go under other parts but it’s not obvious how they attach to each other or if they’re even related at all. I took about 70 screenshots using this tool, not just of the chestpiece but of other parts that I have not yet completed like the gauntlets, boots, and helm. (Also you can see in my tabs that I was working on my summer trip blogs at the same time lol)
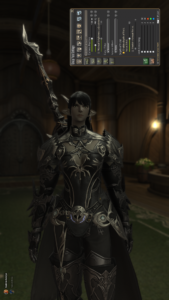
A sampling of the screenshots I took from the game. The camera is harder to wrangle, if more flexible, and the lighting is a bit dark, but it was good enough (a brighter environment would have meant stronger shadows anyway). You may notice that the wig I chose is longer than Vivienne’s ingame hair; this is not completely deliberate but I approve of it, I imagine Vivienne as having the longest hair in the group, much longer than the game will allow. Like, waist-length at least, Ysayle-length (okay the wig’s not that long).
Another step that I began with and continued with throughout the project was consulting with more experienced cosplayers. In this case, that means reading through the many books of Kamui “buy my books” Cosplay, especially the ones about foam armour and props, but also for instance the one about 3D printing props, or working with simple LEDs. Also, of course, watching her videos and other tutorial videos for tips and inspiration and encouragement.
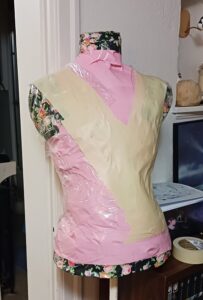
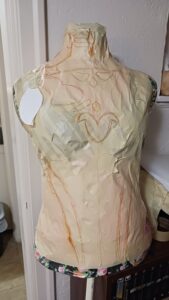
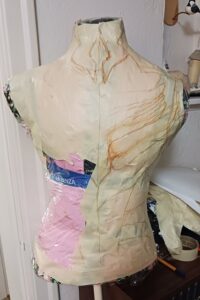
Next step: making patterns! I began by taking the duct-tape mannequin that I had made earlier in the year, and covering it with saran wrap and masking tape, just like I would on myself, and drawing on it. I began to discover that masking tape doesn’t take marker super well, which is actually fine, it gives me some leeway to erase things before they dry.
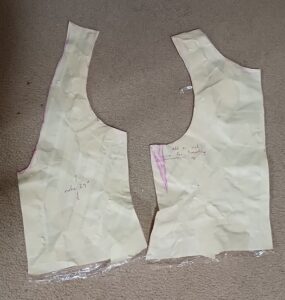
The pattern for the undershirt. Contains notes like “make 24 inches long” and “add an inch for breathing : P”. In fact, it probably could have been longer.
For the armour itself, I wanted a bit more bust, so I strapped my one push-up bra to the mannequin before covering everything in wrap and tape. I think the mannequin is slightly larger than I am; I can fit into my own bra just fine, but it barely fits the mannequin.
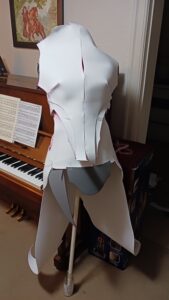
For some of the more 3D pieces, I taped the paper plans together to check that they really would go 3D in the right way. This is the elbow.
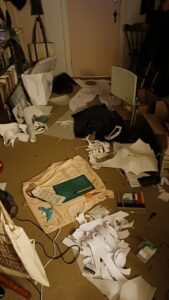
Because there are so many separate parts and layers, I had a huge number of paper pieces when I was done.
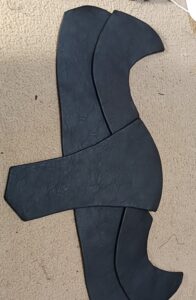
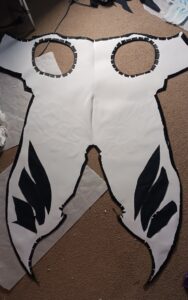
Next step! Buy sheets and sheets of craft foam! (and pleather, I think I bought 5m of pleather) I had some leftover EVA foam from my failed Cronus project, but I needed a lot more. A LOT more. Then when I had them, I just traced my patterns onto the foam and cut out the 2mm parts (most of it) with ordinary scissors. My plan was to cover these foam pieces with fake leather to give the impression that it was stiff leather.
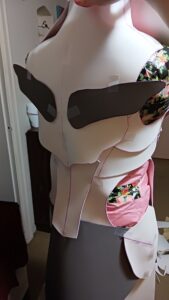
The dark grey sheets are from my previous foam purchase a couple years ago; white foam is newly bought
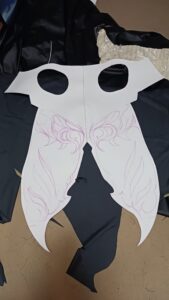
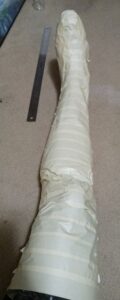
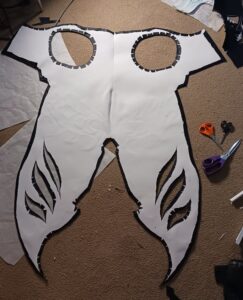
The tail piece, with all the details marked out (and a random leg pattern) on top of a pile of pleather. Note: foam also does not take marker well, and can be very easily erased with a bit of water.
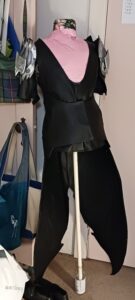
At the same time I was working on sewing all the pleather parts that didn’t require foam. This included the undershirt, which needed a deep scoop in the front so that it wouldn’t show through the armour’s boob windows. It also looked like it had sleeves in the original design, but I didn’t trust myself to figure out how to make a sleeve out of relatively-unstretchy pleather, so I made a shoulder cap with velcro straps. It works fine, though I had to handsew the velcro, it’s very stiff. I’m so glad I have a sewing machine for everything else though! It’s really satisfying to see all those nice straight seams in the pleather. Also I leave gigantic seam allowances that I trim later; I am always too worried that I’ll have made something too small (sometimes I make it too big and then I have even more seam allowance : P ). Even so sometimes it doesn’t work out. A new tool that I found was really great are sewing clips. I found they’re especially good for edges, but if you use them on foam they can leave a permanent indent from how strong they are.
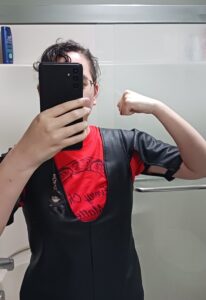
Observe the way I copped out of making a real sleeve! I’m actually quite happy with this vest and would wear it as everyday wear over a shirt, I think it would look snazzy.
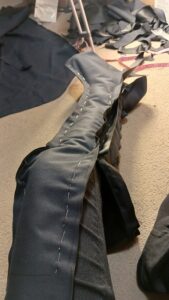
Boot covers proceeding; I added a zipper which will be hidden by the armour plates (we’ll see how well it works when I make the armour!). Was testing the fit before I finished sewing it all.

They don’t look terrible. But I wouldn’t wear them outside yet, so I left them out of the current outfit. The soles are held together with some Worbla thermoplastic pieces which I heat-formed to conform to the bottom of my real boots, not that it helps. I think I need to find another solution before next October.
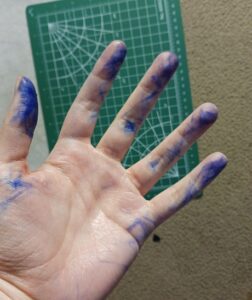
The gloves gave me some trouble, because I began by trying to follow the “easy glove” tutorial which is designed for stretchy fabric, not pleather, and I couldn’t get my fingers in. So I put that aside for a while and turned my attention to “how do I cover this foam in pleather?” I decided to try double-sided carpet tape. This worked quite well for large flat surfaces, but when I folded over the edges it wouldn’t stay, so I used hot glue to keep the edge down. And as I went on, the more I found hot glue is not a reliable permanent solution for anything (it can peel right off of foam when it’s cooled), so eventually I turned to E-6000 superglue. The other tool I began discovering was bathroom caulk, which was highly recommended by the internet for smoothing out seams in foam pieces. I soon found I could use it for other things as well.
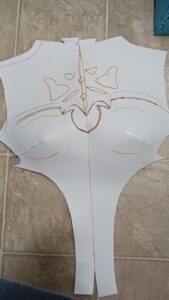
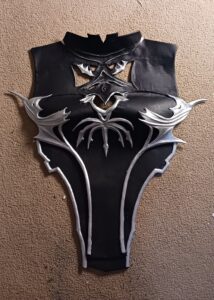
The breastplate (glued at the centre seam with Barge cement), and my first attempts to smooth things out using bathroom caulk. That’s why this is in the bathroom, because this activity involves water. Later I just put down towels and baking paper in the main room and carried on there.
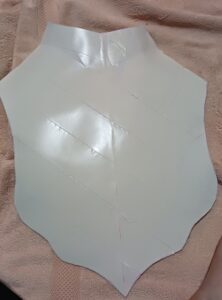
The back plate with a layer of carpet tape, prior to applying pleather. I gave it a slight curve around the shoulders by heating it with my heat gun and pressing it firmly into the mannequin. Don’t know how much it really helped tbh.
It was essential to have as even a layer of tape as possible, because the least irregularity can show through the fabric. I tried to smooth out all the seams in the foam as much as possible, but it was difficult. The caulk doesn’t quite spread out indefinitely (not like wall plaster, for instance), so for instance in the image above you can see a slight lump along the seam in the middle. I decided to accept it as better than being a gap.
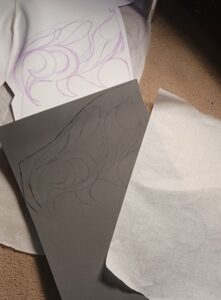
My first idea for this part of the decor on the tails was to carve it out of a thicker block of foam. This proved to be terribly time consuming and frustrating and I melted foam all over a dremel head before I found the correct dremel head for the job and in the end I abandoned the idea, but you can see here the initial attempt, with a sheet of baking paper I was using as tracing paper (marker also doesn’t dry fast on this, so I can use it to transfer designs!)
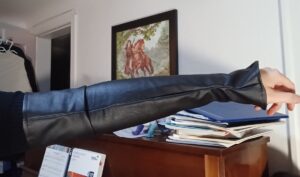
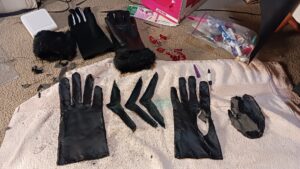
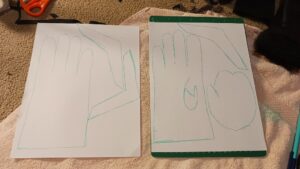
I hadn’t forgotten about the gloves; in fact, I had multiple task lists for this cosplay, revised constantly as I added steps, found new details, and changed my approach to solving problems. So since the arms of the long gloves I had made were totally fine, just the fingers were bad, I cut off the fingers and finished the edges to make a sleeve. This was going to work out anyway because then I could remove the fingers to play musical instruments without taking the whole glove off.
To make new fingers, I found a pair of gloves that were made of a fake leather that was sadly falling apart from age (I think they were a gift from the Haasen family in Ontario? so I’ve had them 4 or 5 years at least). I picked apart all the seams and discovered how they were made (and saved the fur trim, maybe I can do something with that someday!), made a clean paper pattern, and sewed a new pair from my new pleather.
They are short in the wrist, because they have no need to be longer, and maybe some of the fingers are a little sausage-y and one of the thumbs didn’t sew on smoothly but you can’t tell from a distance, and they attach to the inside of the sleeve with snaps. I tried velcro at first, but that really didn’t work, the velcro was too strong and it was impossible to get it to stay flat. The snaps are maybe not quite strong enough, though the one that keeps popping is mostly because it doesn’t quite fit together perfectly. Anyway it’s just to keep the gloves holding together. The next problem that I have yet to solve is to attach the top of the gloves sleeves to the bottom of the vest sleeves, because they keep falling down a bit. I tried a snap, but it doesn’t allow enough flexibility when moving my arms. So I think I will maybe try some lacing? The glove sleeves can semi-permanently attach to the chestpiece, that’s fine as long as I can get the hand parts off.
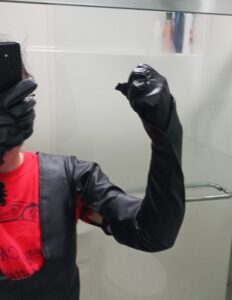
“This techological terror you’ve constructed is insignificant next to the power of the Force-” sorry, wrong villain
After I had gotten frustrated with attempting to carve the tails decor into something useable, I gave up and tried using foam clay – but that didn’t work because foam clay is the wrong product for that; it’s better used for large rough shapes, not tiny details (I’m considering remaking Achiyo’s horns from it, for instance). Then I finally hit on using the caulk not as a filler, but as a sculpting medium, using water and my fingers just like the internet said to use for seams but leaving it 3D instead of smoothing it down. This worked brilliantly and I abused it for the rest of the project. Often I would touch it up when it was dry using a dremel which Isabel gave to me.
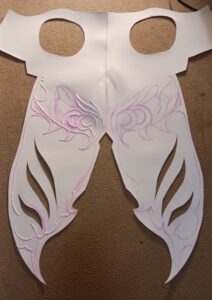
Progress! Finally!!!! This took several days to do the entire thing in sections. If you check different sources, you may notice that I didn’t get all the shapes correct, especially around the tips. …But I think I’m the only one who cares about that, haha.
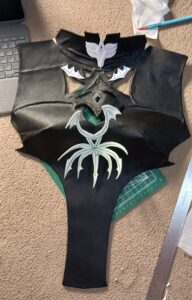
You can see some caulk shaping around the neck and the windows; I used E-6000 glue to ensure that it stuck to all the crevices as much as possible. Here I’m testing the fit of the trim ornaments that go on top. Don’t worry about the seams on the sides, they’ll be hidden.
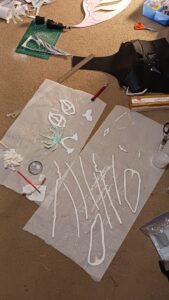
Caulking and painting the oodles of trim! You can see in the background I was using the dremel on a piece of foam trim which hasn’t made it into the finished costume yet.
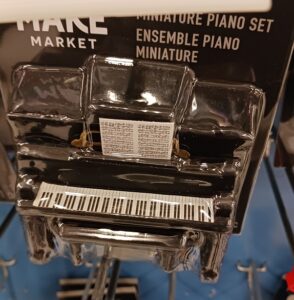
On one of my trips to Michael’s I found this… interesting… piece of doll furniture. Hmmmm hahahahahahaha
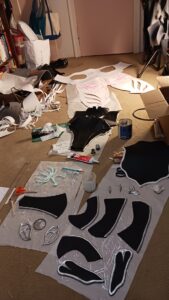
Trim is painted, varnished, glued on, and then I added more caulk to the edges (which meant more painting and varnishing). Got quite a production line going. I used several Citadel paints, because I was used to them, but I also had another larger bottle of the base silver. I used a concentrated juice can lid for a mixing plate lol.
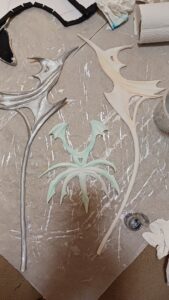
The largest chest front decor pieces. The side parts aren’t as accurate as I’d like, if you compare to the screenshots you can see the angles are off.
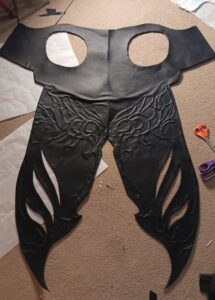
I was not completely successfully in getting the pleather to glue into every crevice, because there are SO MANY of them, and I felt it necessary to do large amounts at once.

After the inside was also covered in pleather, the very last detail of this was some large stitches which you can see in the reference pictures. I used kitchen twine, sewed it in with a leather-working needle, and painted it black so it wouldn’t stand out. Here you can see one half painted and the other half not. And yes, this whole piece should actually be grey, but… I didn’t think it was worth it. Also, it’s held together with velcro.
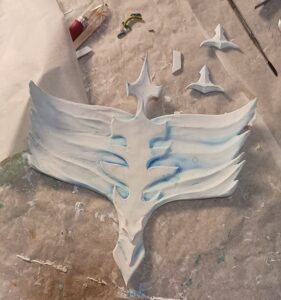
I had been working on this large piece for the centre of the upper back when ‘disaster’ occurred: I had accidentally bought a tube of clear caulk instead of white caulk (they’re exactly the same except for the word ‘clear’ or ‘white’ at the top). The clear caulk is much more plasticky, dries extremely slowly, and does not dremel. So I had to remove it all and redo it in white, which was a little discouraging.
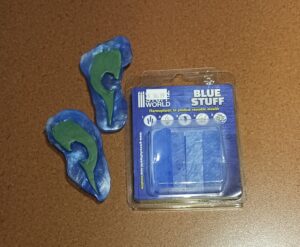
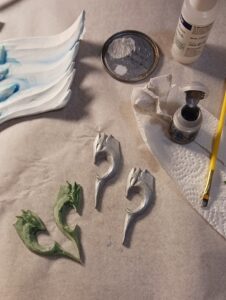
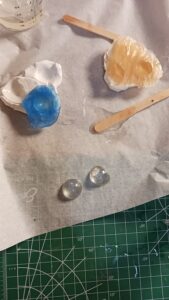
I made these trim pieces for the pauldrons out of green epoxy modelling putty, and then needed a way to duplicate them – so my dad introduced me to Blue Stuff, a mould-making substance which he had ordered on a whim and it had arrived THE DAY BEFORE. So I made moulds and then shoved more green stuff into them!
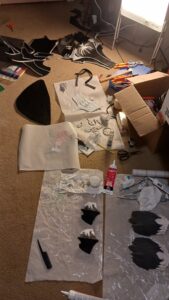
In this series of pictures, you can see the pauldrons taking shape in the bottom right. Here you can see it has mostly bare foam and only one layer of caulk feather shapes.
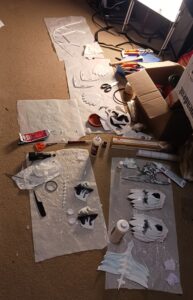
All the caulk feather shapes! Also a minor detail, but on the left baking paper sheet you can see the row of dots that forms the back-of-the-neck detail that you can’t even see under all the hair.
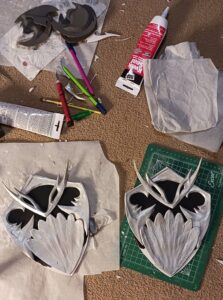
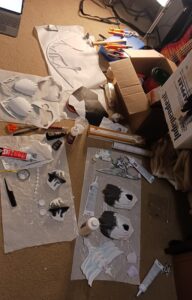
The hip guards look like Power Ranger faces or something if I lay them out like this hahaha. You can also see the belt pieces in the dark grey foam at the top. There’s always more details to work on!
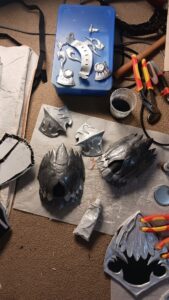
Paint on the pauldrons and all the other little trim bits! I went through quite a few small cans of spray paint.
One of the items you can see in the above photo is the handle that goes on the lower back; it’s a Worbla thermoplastic piece with a layer of foam on top, carved with an x-acto knife and just a simple clay sculpting tool. You can also see I have a number of plumbing tools lying around, those were very useful… as weights to make sure that pieces glued together correctly. In a few places they were too heavy, and left dents in the foam/caulk, but it was easier than holding them together by hand.
The pauldrons were made with a piece of Worbla shaped to my shoulder to keep it close to my body (tip from Kamui Cosplay), and then foam pieces on top covered in caulk, and then the topmost plate made of Worbla also with caulk detailing. Inside, there are some VERY STRONG rare earth magnets to attach it to the vest. I was worried about the magnets sticking to each other more easily than to the armour pieces (if I let them attach to each other naked it takes me an indescribable amount of time and possibly injury to separate them again), so the magnets that went inside the pauldrons I glued down with a layer of Worbla (which would bind to the Worbla shoulder caps) and then put on a piece of foam as padding to try and lessen the magnetic pull. The side of the pair that goes inside the vest I wanted to be removable, in case I wanted to wear the vest as a fashion piece, so eventually I figure out how to make that work reliably: the internal magnets are sewn into little pouches, onto which is glued velcro so the pouches can be removed. If I just glued velcro directly to the magnets, it would peel off, even the E-6000 glue, and in fact it did before the Halloween concert on one side so I’m only wearing one pauldron in those pictures. But having them work with magnets is super cool, I can just slap them on my shoulders and they go! Even if I’m wearing a sweater in between or something, which is pretty funny looking. : )
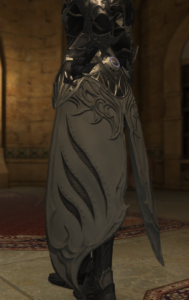
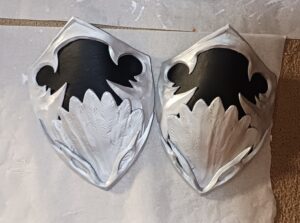
The hip guards were a surprising number of layers, and all them except the bottom needed caulking. I had wanted them to be very curved in three dimensions, and had cut the bottom shield shape in a certain way to try and make that work, but by the time everything was glued together it looked quite flat again. But not to worry, I took a strip of foam and glued it to put tension on the sides of the shield and it made it curve at least side to side!
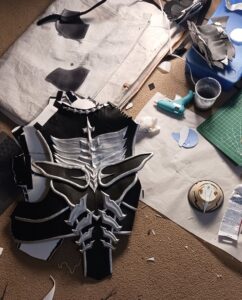
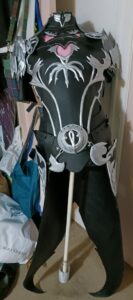
Sometime around this time I was assembling all the different plates, starting from the back, and trying to figure out how to get it to stay closed without being obvious. I’d had some plans for where these joins would be from the start, but actually getting it to work was another story. I don’t have a lot of pictures of this stage.
One problem was the neck. It was very difficult to figure out how to make a 3D shape out of a 2D piece of foam, and I ended up having to cut darts into the collarbone and gluing more pleather behind them to hide the gaps. Black paint on all the edges hid everything else.
The easy part was the shoulders. One side I used twine to stitch/lace together, and then hid the join with the patch that goes there in the design, glued it down. Then the other side, I glued velcro straps. And over top of the velcro straps, I glued the other patch to the front plate, with more velcro to attach to on the back. Maybe it would have been more ergonomic to have the patch glued to the back plate and have the velcro on the front plate, but at least this way the front plate is guaranteed to look consistent.
The sides of the armour, oh boy. I wasn’t sure what to do with those. I tried a really elaborate lacing system of twine before giving that up as complicated and not working, and eventually I glued the ‘closed’ side shut permanently, and glued a ton of velcro to the other side. Velcro is surprisingly strong, and it actually does work to hold it closed. Now that I’ve lost a bit of weight, too, it should continue working to keep the ‘form-fitting’ shape that the original model suggests.
AND THEN I found out something upsetting: it didn’t fit. Or rather, it fit a mannequin just fine; it wouldn’t let me move my arms hahahaha. So I had to cut off the spikes of the boob decor pieces (not really a great loss, they weren’t accurate anyway, no one would notice they’re gone) and big half-circles out of the breastplate by my armpits. Emergency surgery! A bit of black paint on the edges and no one sees. Everyone would be distracted by the pauldrons anyway.
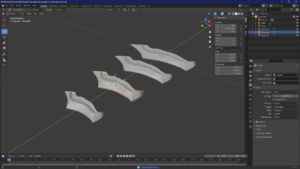
Then I had to figure out the machine-made-looking bits. I was trying out Blender as my sister-in-law has a 3D printer and was willing to do some parts for me. I quickly found it more difficult than I was anticipating, even after watching The Blender Tutorial (the parts relevant to me, anyway). So for the larger parts that hold the LEDs on the front and back of the waist, I decided to try something else.
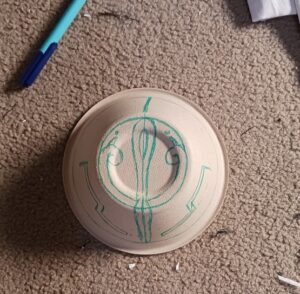
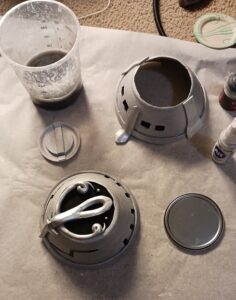
This part stumped me for a while. One day I went to a grocery store I don’t normally go to, and saw these biodegradable disposable bowls! Perfect!
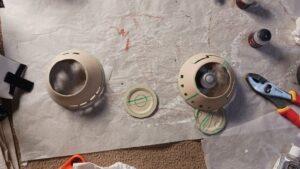
Well, not quite 100% accurate perfect, but close enough that no one cares. They worked really well with an x-acto knife!
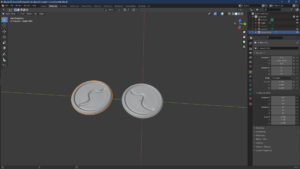
A super small detail on the rondels, but even this took me several days to figure out how to get it just right.
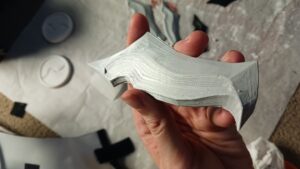
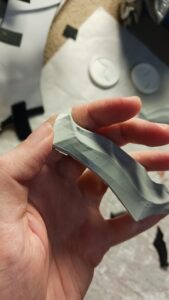
One of the biggest pair. I had to dremel all these for quite a while to smooth them down, and they weren’t quite smooth as metal, but I decided I wanted the sharp angles as much as possible and so didn’t cover it in caulk.
Assembly is proceeding! You can see the front light on the right covered in foam and caulk and epoxy.
To cover the LED windows, I printed out a sheet of printer paper with the shade of blue that I wanted (sampled directly from the game >: D). Then I took a sushi take-out container made of clear plastic. From both of these I cut out appropriate shapes and glued them to the inside of the bowls. After that it was a matter of wiring up the LEDs.
But wait! One last problem, and less than a week to go before the outfit’s debut! I had forgotten to check that the LEDs I already had on hand would be compatible in this project, and they are not. I had been given a strip of LEDs designed to provide customizable home lighting; they are not designed to be cut into small pieces and wired with electrical wire from the hardware store. (They are currently hanging around my window as Christmas lights, though the strip doesn’t work if the remote control is out of battery which is REALLY DUMB.) I also had bought a big strip of multicoloured LEDs for use in Cronus, but that would require a programming chip to operate, much too fancy for just turning a couple white lights On and Off. So I bit the bullet and ordered a bunch of small individual white LEDs from Amazon (who normally I boycott, Bezos doesn’t need my money, but their shipping times are reliable). They arrived just in time, the day before the concert iirc. My first wiring job was just masking taping everything together – the wires, the LEDs, the batteries. And with such a hack job, the front piece didn’t stay lit during the concert. The back piece did though, so that’s great, that’s what most people saw. Later I went to visit my parents because my dad has a soldering iron, and he showed me how to do it properly, with electrical shrink wrap and everything. Now I just need to find some small electrical switches so I don’t have to use tape to keep the wires connected to the battery, and it will be completely finished.
Oh yeah, the belts – for the upper belt, I had an issue with the foam/pleather part of the belts being too long, so I had to cut them down. Bit disappointing because now I know there’s a seam there; if I had had more time I probably would have remade them. But it was very hard to measure until I could try it all on. The metallic-looking parts are just straight Worbla (I don’t think I even painted it? I was in a hurry by this point lol), and the brass studs are actually thumbtacks painted the correct colour. I had a terrible time getting them to stay, even with E-6000 glue, and with hammering down the tack points to hook onto the belt pieces. I had hoped I wouldn’t have to glue them, so the pieces could move freely, but having it hold together ended up being more important. One connection has snaps so that I can get in and out of it.
The lower belt is made in the front from a chain I bought at the hardware store almost on a whim, just because it looked heavy and metal and kind of heavy metal. There does appear to be some kind of chain in the original game outfit, but it’s a bit hard to see what’s going on there so I simplified it. The foam pieces that attach to it are held on with Worbla tags. The hip plates are joined in the front with crab-claw clasps designed for like keyrings, and in the back I used pieces of jewellery chain to attach the hip plates to the back butt plate.
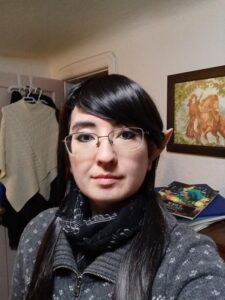
Wig/ear test, going to work before I was ready to wear the whole thing. Vivienne would look super cute with these low pigtails, which is why irl she wouldn’t be caught dead in them. But they helped me keep the hair from tangling while I was moving around. Note the Kamui book in the background haha.
The wig is from light-in-the-box, as I often do. The ears are from Aradani Costumes, and they’re really great. They look a bit silly sticking out from my head while my hair is in a wig cap, but once I put the wig on they’re just the right length, I think. My dad said he wasn’t even tempted to photoshop some of the seams in the photoshoot pictures because they somehow just blend into my real ears so well. At least the left one does. The right one was more of a problem.
Oh yeah another problem: I think one of my contact lenses (from Pinky Paradise) arrived with a flaw; whenever I put the lens for my right eye in, I could feel scratching on my eyeball. And even after I took them out, the sensation lingered, so at around 1am the night before the Halloween concert I went to the ER because I was worried that I had gotten something – a piece of dremeled caulk, perhaps? – stuck in my eye. I waited there for like 4 hours, felt bad for all the people there with real problems, and then the doctor couldn’t find anything even though he put in eye dye drops to help him look. He gave me some cream to make sure that it didn’t get infected, and then I walked home (it’s only a 30 minute walk). The problem persisted whenever I tried again, so I’m pretty sure now I just got defective contacts. Which is a bummer, and the reason why my eyes are photoshopped in that last photoshoot picture. (Still has scared me into making sure that I wear full eye protection and not just glasses when I do dremeling in the future.)
ONE MORE DETAIL: there are a number of gems scattered about the chestpiece. I had bought some new epoxy putty to replace the batch I had totally used up on the pauldron pieces, but I didn’t like it (too stiff) so I made them into moulds for the gems by painting liquid rubber on top of them (and then I got lazy and used Blue Stuff for more duplicates (the Blue Stuff does distort a tiny bit around the edges, but close enough)). The liquid rubber smells kind of like fish to me? Then I wiped them with vaseline and cast them in resin. When the resin cured, then I painted them with nail polish. The top gets painted with clear nail polish to smooth out any roughness in the surface (and it works like a charm, makes it look totally clear), and the bottom is painted with coloured nail polish. It needed several coats to go on vividly enough. Although it was funny, I went to a couple different drug stores looking for the right colour of polish, but then ended up settling on the blue-black-sparkle shade that I already owned. The gems really need a top setting to hold them in place, but that’s a detail I can add later. (I think I literally glued them on the morning of the concert.)
Carting all this around is a trick, especially in a car. I found that I had to strip right down to the undershirt and carry the rest… somehow. The tail pieces have those holes that act as carry handles, but the main chest piece is too huge to fit in a mere grocery bag. So I have the tails hung over my shoulder, a grocery bag with the gloves and pauldrons and the LED pieces (attached separately with velcro so I can get the lights going on my own schedule), and then the chestpiece carried through the sealed shoulder hole. I must look ridiculous. It’s much easier when I can just dress up and walk to work. It takes rather a while to put on, so maybe not quite as successful as Rinala’s outfit, but then armour usually takes longer than clothes, right? When I did walk to work, a couple random people complimented me on the street! Fewer than I would have expected, really, but each one is an ego boost and validation so yay.
I was working on armour plates for the arms, to try and get my whole upper body completely armoured before the concert, but once the chestpiece came together my body went “DING you have completed a thing, time to give up” and I had been working VERY hard on this for two months solid, and I agreed it was time for a rest. Especially since Nanowrimo was about to happen and I didn’t know what I wanted to write about. But I did manage to cut out the basic shapes of the arm plates, although I did rush the caulk/sealant application (the sealant is really icky too, I hope I don’t have to throw out half the arm plates I already made and start over).
Your prize for making it this far is the practice session recording of my piece. The costume was not nearly finished enough to test (which worried me a bit before the concert). I chose this piece because I thought it would be great to play a Final Fantasy piece while dressed as a Final Fantasy character (even if one of my own design).
So next summer/fall, my goal is to: polish some of the issues I found with the current iteration of the outfit, finish creating the arm pieces, finish the armoured boots, make a helmet just for the lulz (Vivienne does wear a helmet, just not in cutscenes), and build Cronus. I’m not planning on a big vacation next year so I should have more time for it.
Credits: My parents for helping me several times along the way, especially my dad for the Blue Stuff/soldering iron/photoshoot. Isabel for the gift of the dremel, I used it a ton. The Haasens for the gloves that eventually became patterns.
Jennifer I now view yu as a genius. Albert Einstein did nt work as hard as you.
Much admire for your creativity extraordinary perseverance! Blowin away.
Jewel
Thanks so much for your compliments! It’s not a long-term sustainable expenditure of energy but I love looking at the finished result!